Revenues
How do I issue an invoice?
Create an invoice with a customer, lines and VAT, choose the currency and payment method, then download the PDF or send it by email.
You issue invoices in an editor where you choose the customer, add the lines and check the VAT, currency and payment method. The number and dates are filled in automatically. Issuing invoices is available on every plan.
New invoice and customer
- Open Revenues from the menu.
- Click New invoice at the top right.
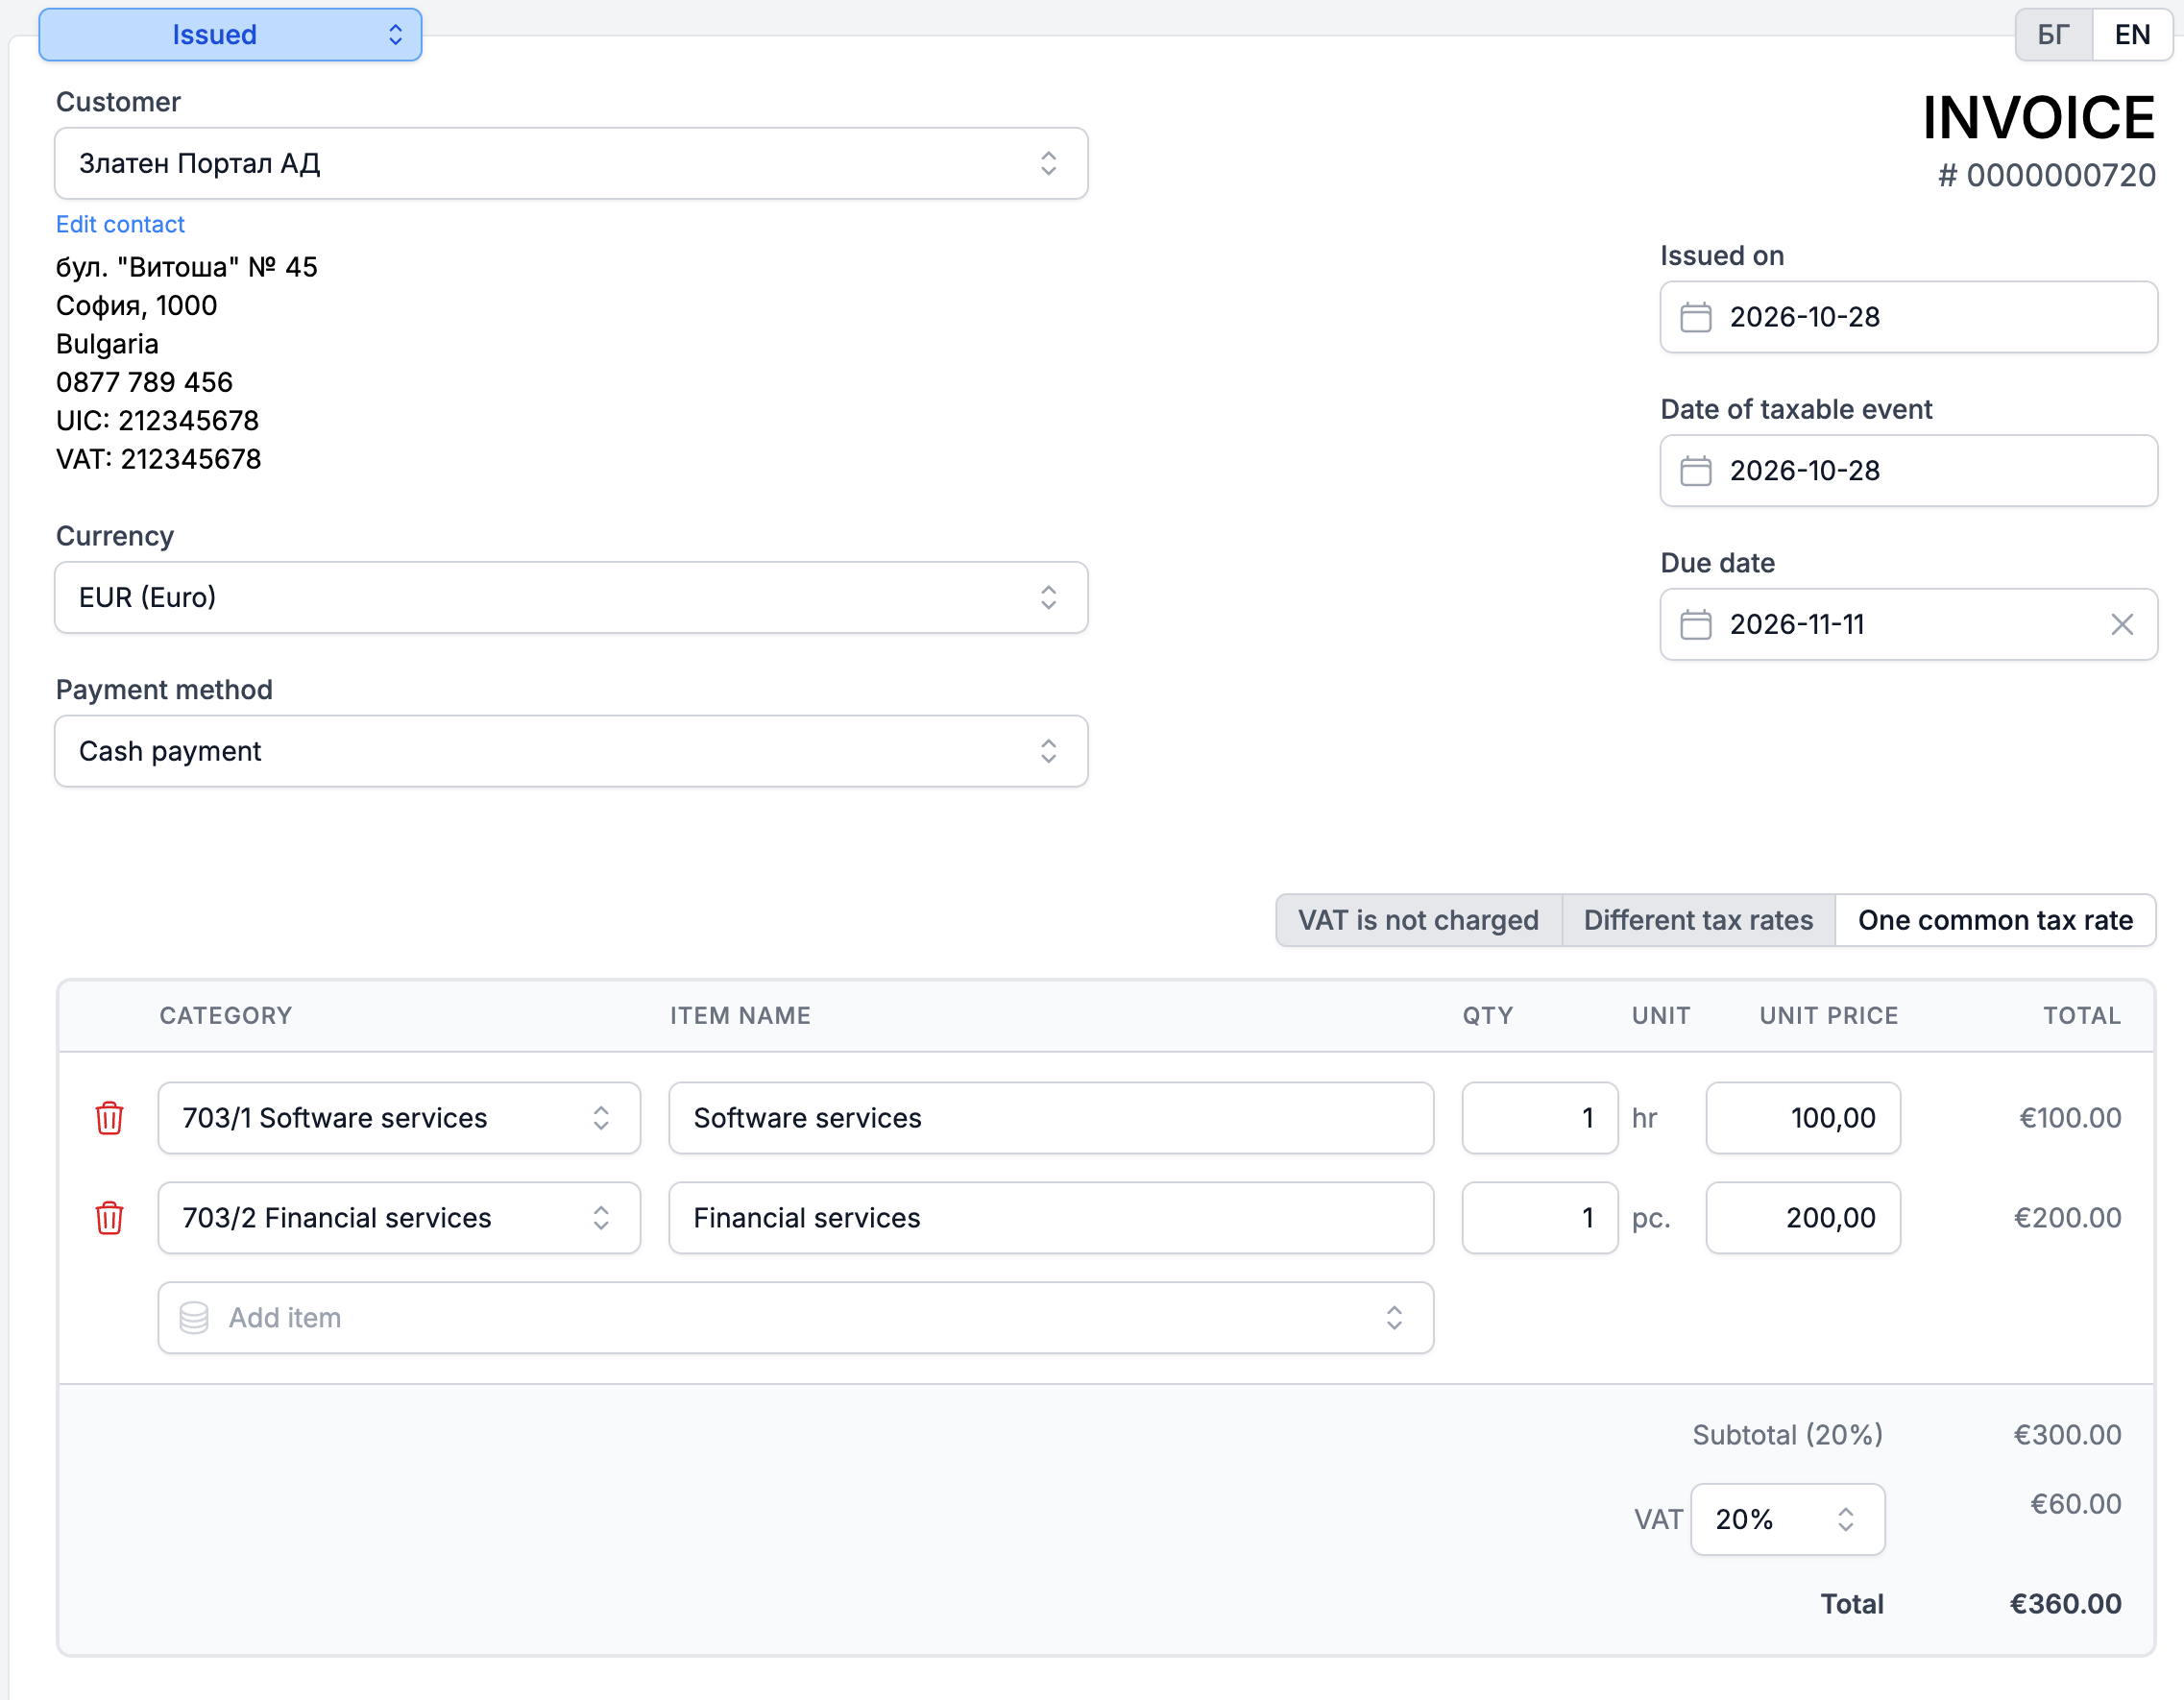
- In the Customer field, start typing the name and choose the customer. The list only shows contacts marked as customers.
- If the customer is missing, click New contact at the end of the list and create them without leaving the invoice.
Once you choose the customer, the invoice takes the customer's settings: currency, language, payment method, bank account and notes. To change the document language, use the БГ and EN buttons at the top right of the invoice.
Lines
- In the Add item field below the table, type part of the name and choose an item. The name, price, unit and category are filled in from it.
- For a line without an item, type the text and click Add "…" as a single-use item or press Tab. Such a line is not saved to your item list, so choose its Category and Unit yourself.
- Fill in Qty and check Unit price. To remove a line, click the trash icon at its start.
More about items: How do I add an item?
VAT and the reason for not charging it
If the company is VAT-registered, there are three buttons above the lines: VAT is not charged, Different tax rates (adds a VAT % column) and One common tax rate (you choose the rate next to the VAT row in the totals). The rates are 0%, 9% and 20%. For customers under the OSS scheme, they are the rates of the customer's country.
When you do not charge VAT, choose the reason in the Basis for VAT Application/Exemption field below the notes. If you leave it empty, a "Missing reason for non-charge of VAT" warning appears when you save: Back takes you back to the invoice, and Submit without reason saves it without one. For a company that is not VAT-registered, the field is pre-filled with the reason under Art. 113(9) of the VAT Act.
Currency and exchange rate
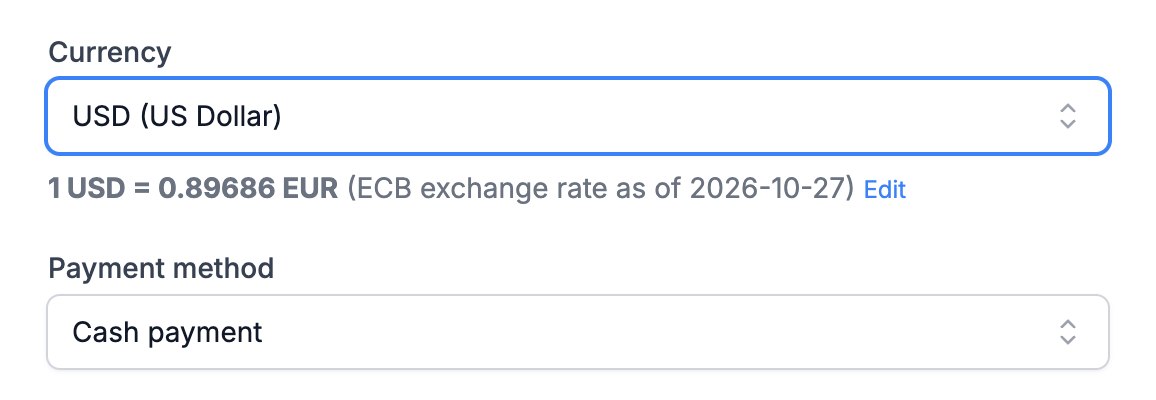
The invoice is in the customer's default currency, and you can change it in the Currency field. When it differs from the company's base currency, the exchange rate is shown below the field:
- between the lev and the euro: the fixed rate of 1 EUR = 1.95583 BGN, which does not change;
- for other currencies: the European Central Bank rate on the issue date. It updates when you change the date, and you can enter a different rate with Edit.
The equivalent in the company's base currency is also shown below the totals.
Number, dates and payment
The number is below the document title. If you have several numberings, choose another one with the Change prefix button. The number is assigned when you save: the invoice gets the next free number in the selected numbering. Setting up numberings is described in a separate article.
Issued on and Date of taxable event default to today's date. Due date is 14 days later and can be cleared.
In Payment method, choose, for example, Cash payment or Bank transfer. For a bank transfer, choose the Bank account to show on the invoice. To add a new account, click New bank account at the end of the list.
Saving
Click Save. The invoice is created with the status selected at the top left (Issued by default), and its page opens. eFirma has no drafts: every saved invoice gets a number. You can change the invoice later with Edit.
After issuing
- PDF: click the down-arrow icon (PDF) above the invoice. For an invoice in Bulgarian, first choose Original or Copy. On a phone, this action and the next one are in the three-dot menu.
- Email: click the envelope icon (Send email). The To field is filled in with the customer's email address, and Subject and Body have ready-made text. Click Send, and the PDF file is attached to the email. Sending by email is included in the Business and Firm plans, but not in the trial without a card added.
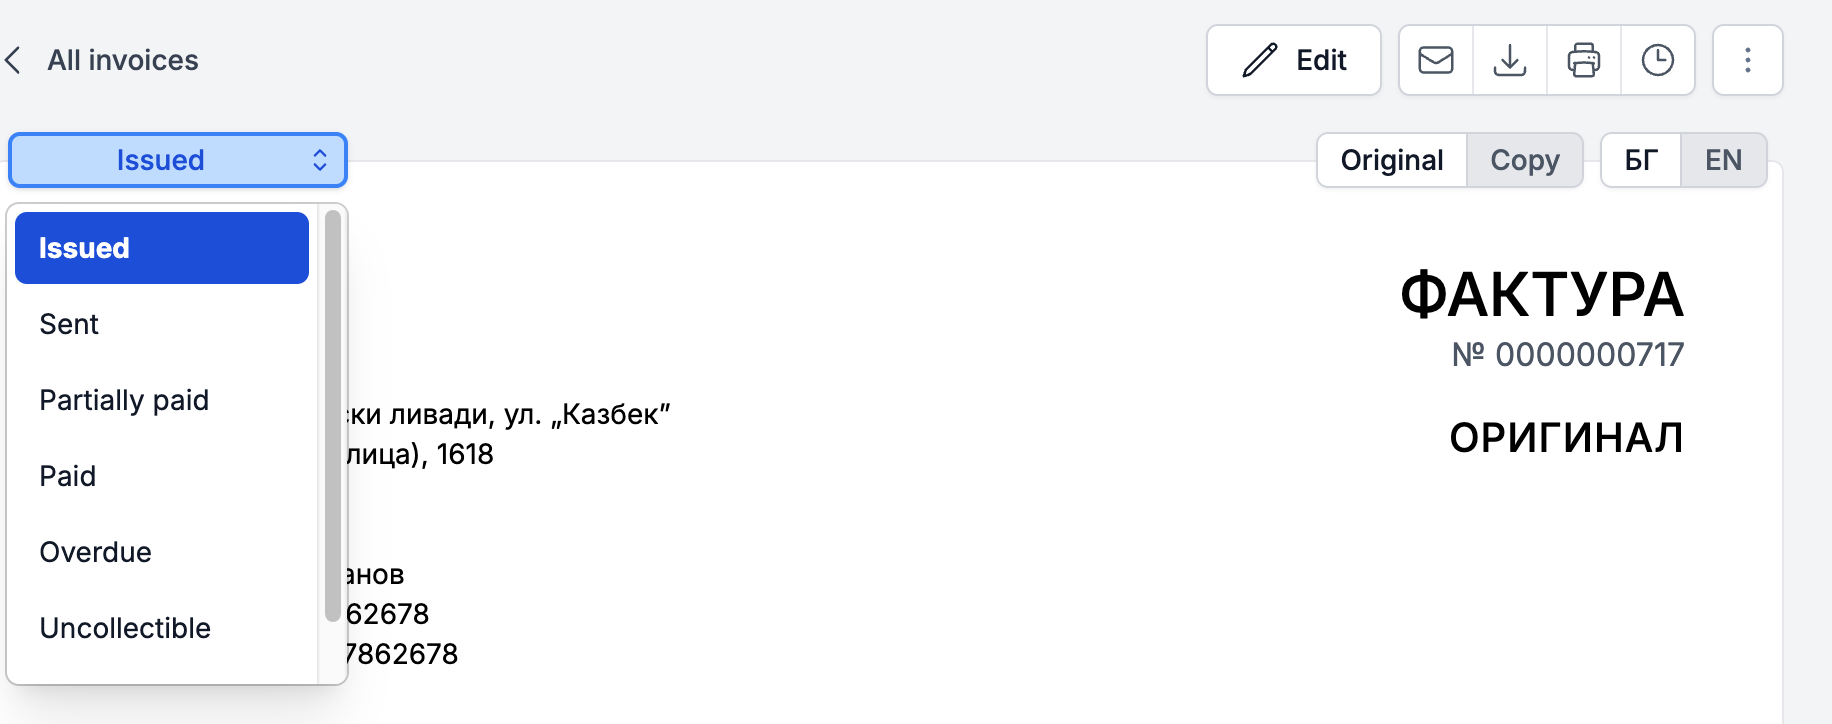
- Payment: when the customer pays, click the status at the top left of the invoice and choose Paid or Partially paid. On the Business and Firm plans, if you link a payment from your bank account to the invoice in Payments, the status changes automatically.
Proforma invoices and notes
You create a proforma invoice with New proforma invoice from the arrow next to the New invoice button. In the proforma's three-dot menu, Issue invoice opens a new invoice with the proforma's details. You create a credit or debit note from the invoice's three-dot menu.
More in Revenues
Did not find an answer? Write to us through Feedback in the app or through the contact form.
Ready to get started?
Registration is free, and your first invoice takes only a minute to issue.
Start for freeNo credit card required. You can cancel at any time.