Files
How do I work with my company's files?
Upload your company's files and organize them in folders, find them with search and starred items, and restore deleted ones from the trash.
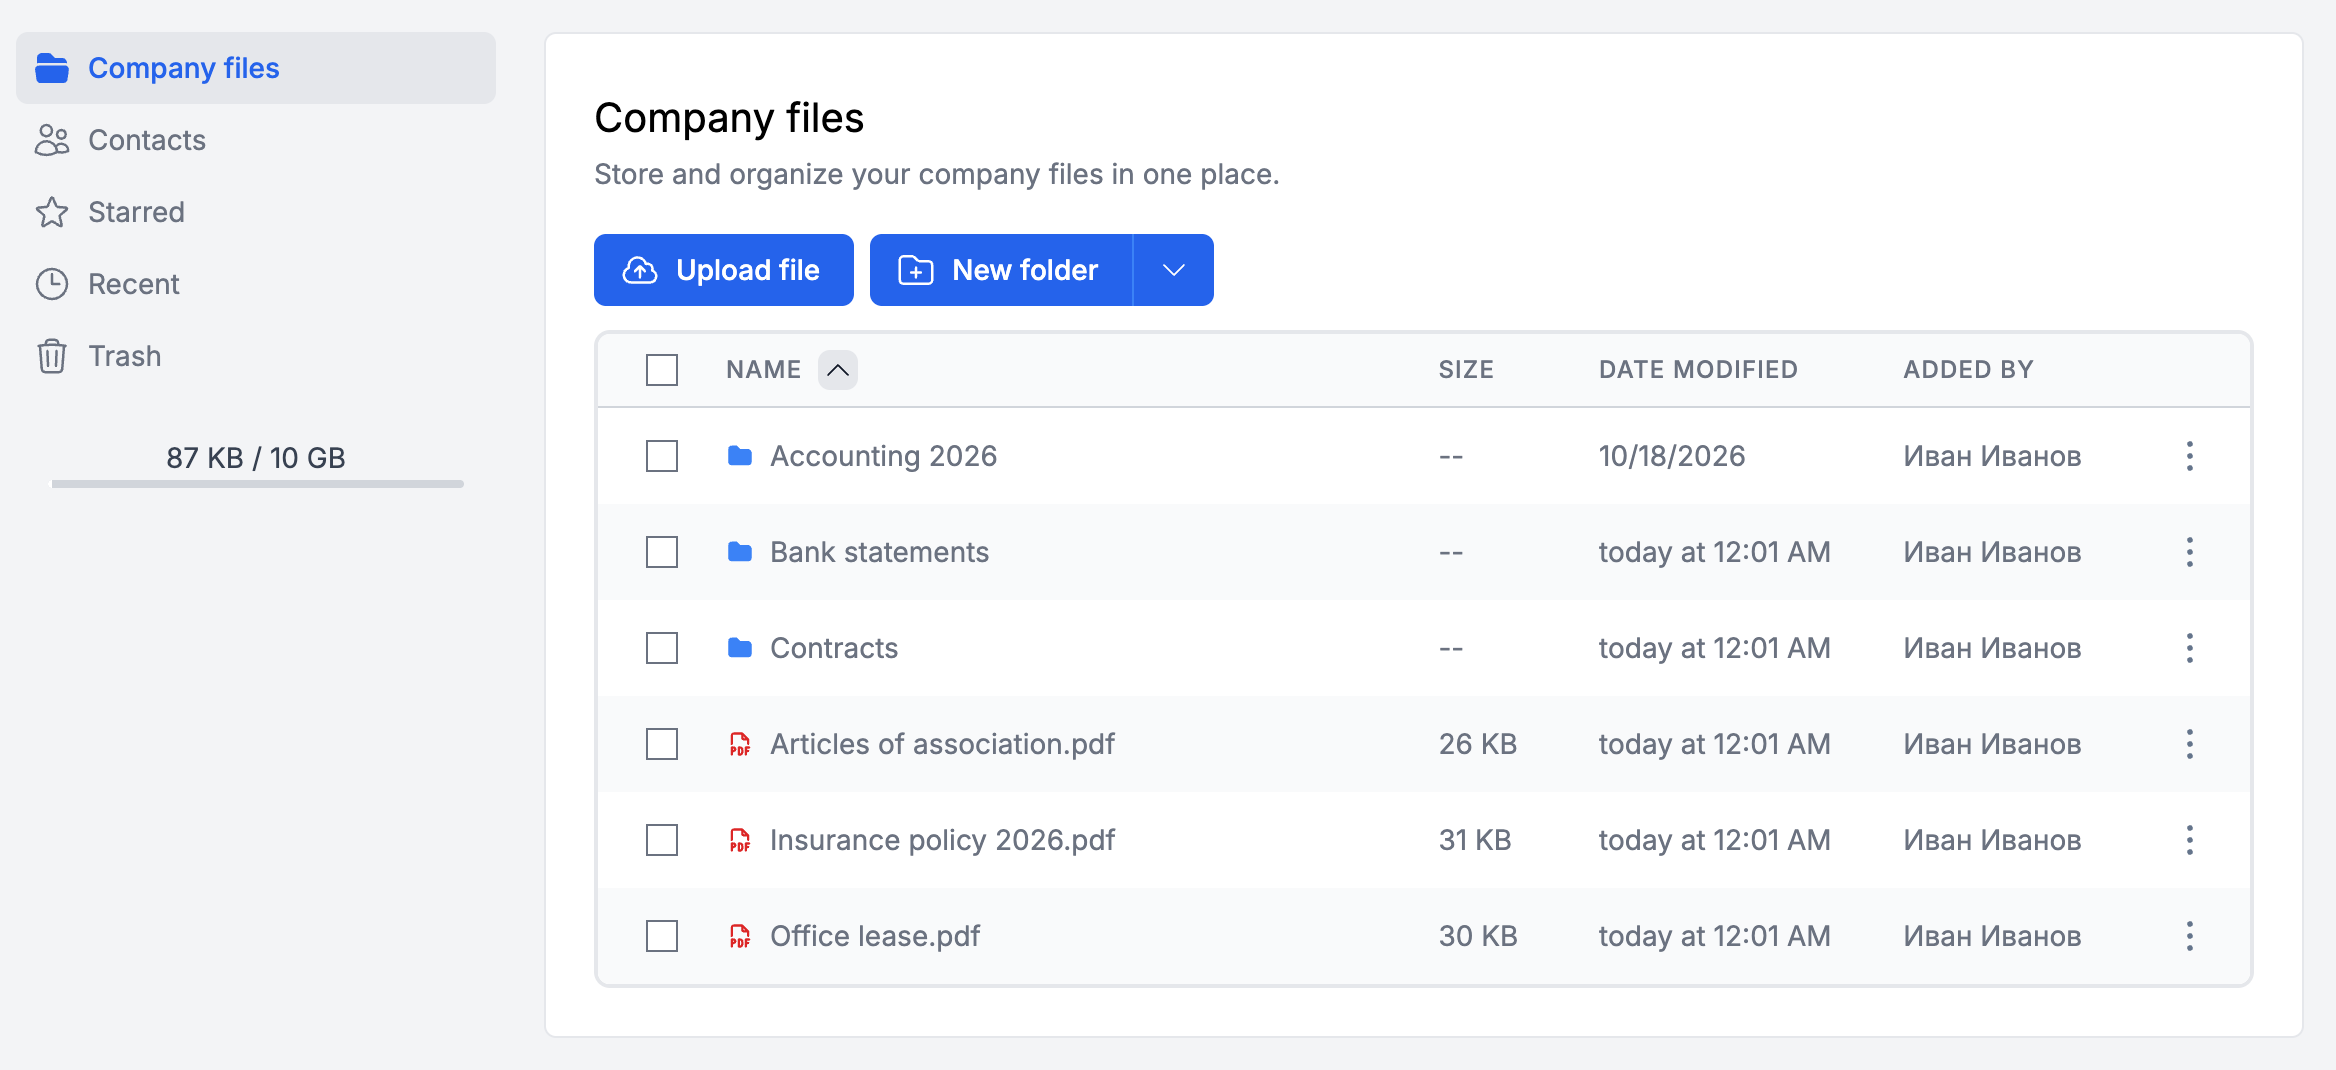
The Files section is the shared place for your company's documents: contracts, reports, scanned documents. You organize them in folders, and everyone with access to the section finds them in one place. In the plan descriptions, this section is called eFirma Drive.
Storage space by plan
The Business plan gives you 10 GB. On the Firm plan, 50 GB is shared by the firm's own company and the client companies it covers that have no plan of their own. You can see how much space is used below the menu on the left of the Files page. Files in the trash do not count. When the space runs out, uploads stop until you delete files.
The Free plan does not include this section: the Files page shows This feature requires a paid subscription. with a Choose a plan button, and the upload and new folder buttons are disabled. If the company moves from a paid plan to Free, the files in its folders are not deleted, but you can open them again only on a paid plan.
How to upload files and folders
- Open Files from the menu.
- Open the folder you want to upload the files to. The main folder is Company files.
- Click Upload file and choose one or more files.
You can also drag files or whole folders, together with their subfolders, from your computer onto the list. If a folder with the same name is already there, the two are merged without duplicating files that have the same name. Each file can be up to 50 MB.
How to create folders
- Open the folder where the new folder should go.
- Click New folder.
- Enter a Folder name and click Save.
If you often create the same folder structure, save it as a template:
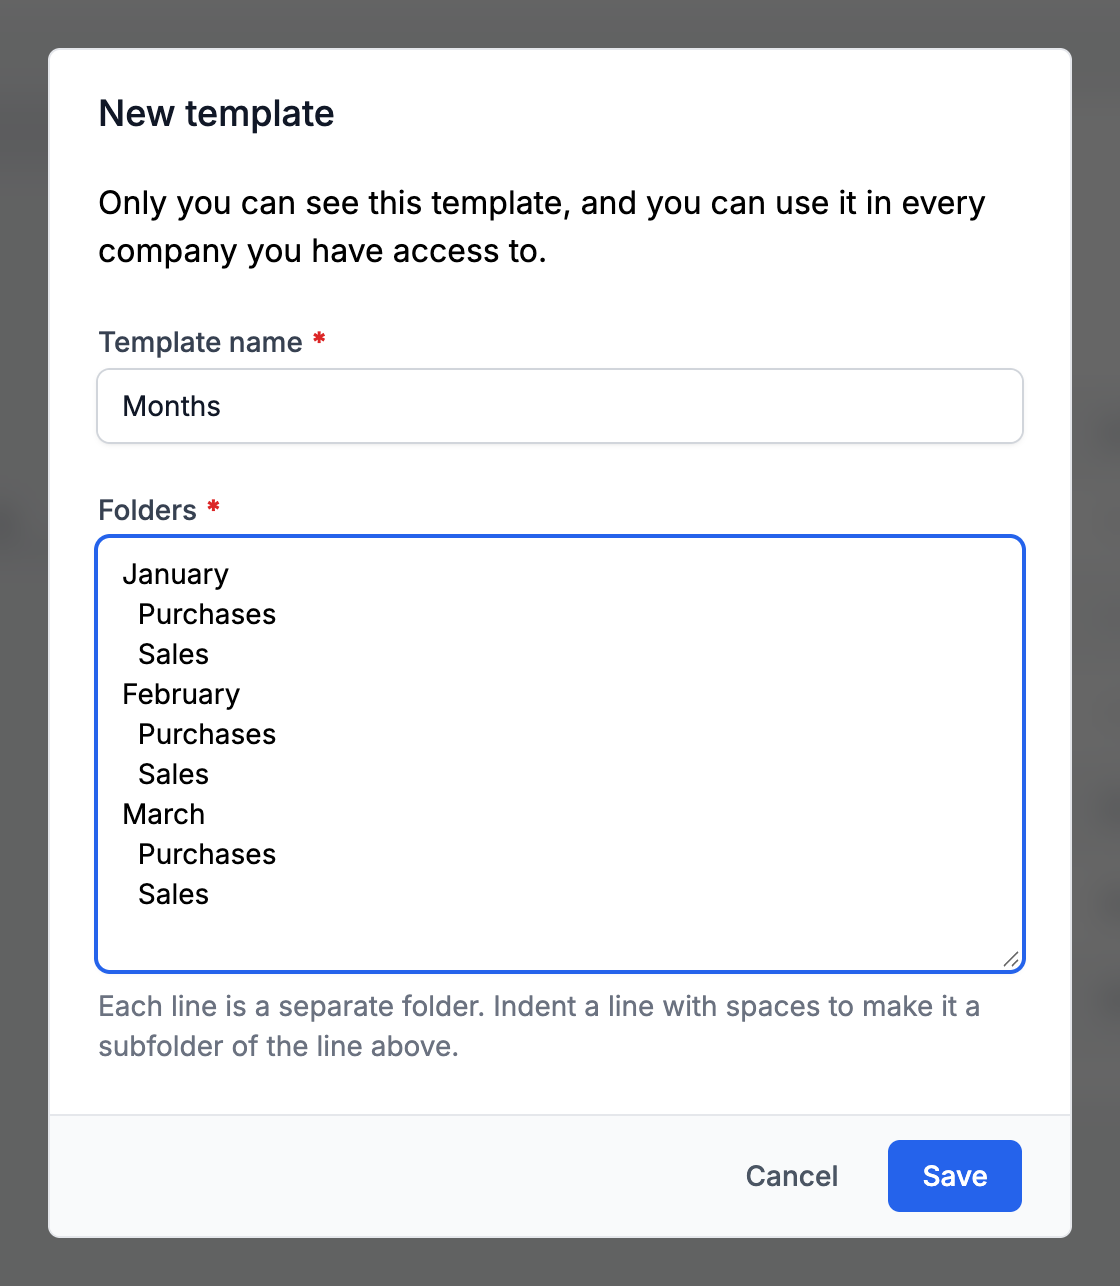
- Click the arrow next to New folder and choose New template.
- Enter a Template name, and in the Folders field write one folder per line. A line indented with spaces becomes a subfolder of the line above it.
- Click Save, then Create folders.
The folders are created in the open folder, and folders that already exist are not duplicated. Only you can see the template, and you can use it in every company you have access to.
How to move, rename or delete a file
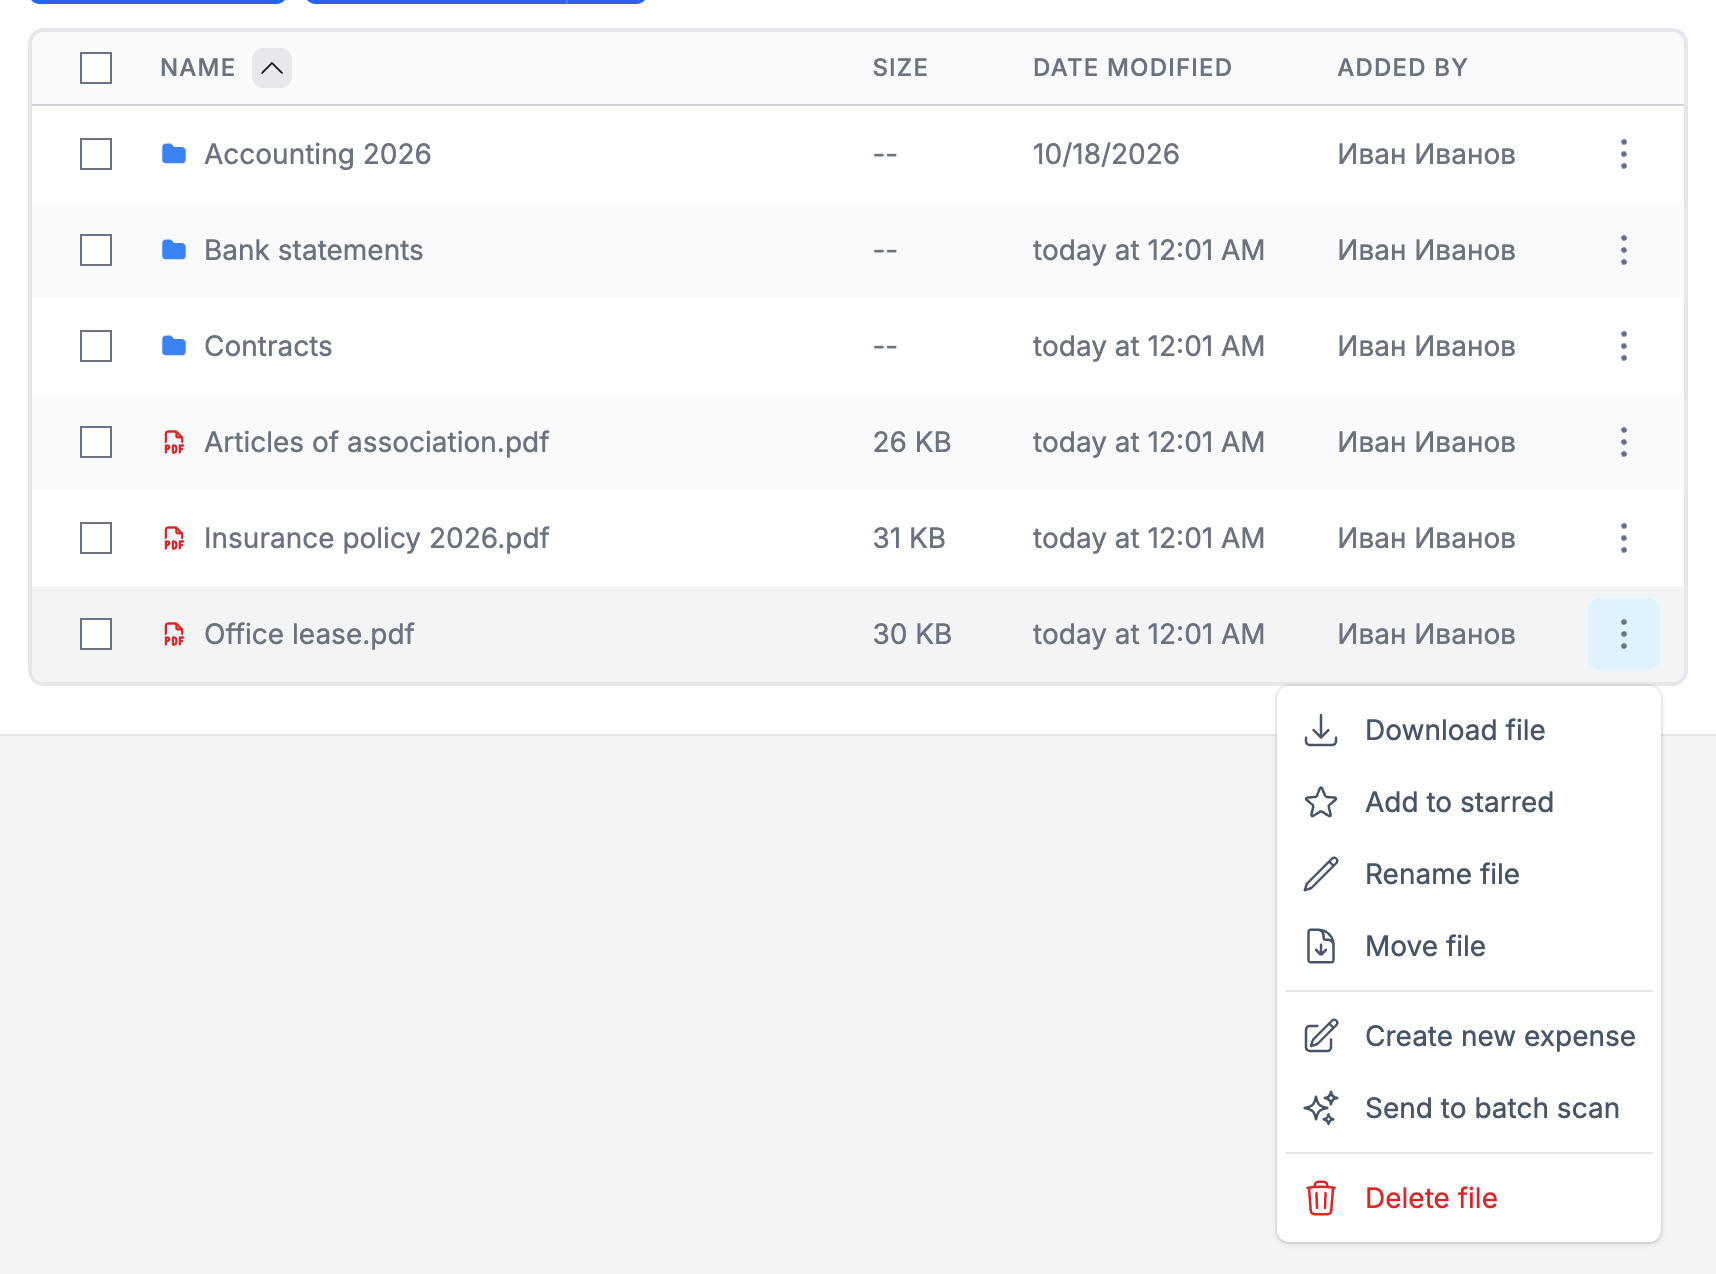
Each row ends with a three-dot menu, where you download, rename, move or delete the file. When you rename a file, its extension (for example .pdf) stays the same. To work with several files at once, tick them on the left and use the buttons above the list.
Starred, recent and search
Choose Add to starred from the menu of a file or folder to find it quickly in Starred in the menu on the left. Only you can see your starred list. Recent holds the last 50 uploaded files. To find a file by name, type in the Search files... field at the top of the page.
Files on contacts and documents
Files you attach to a contact (the Attachments field in the contact's Additional information) appear in Contacts in the menu on the left, in a separate folder for each contact. You cannot rename or move these folders, and deleting one does not delete the contact.
Files attached to an expense or other revenue are kept in the document itself: they do not show in Files and do not use your storage space. If you choose Create new expense from a file's menu, the new expense gets a copy of the file, and the original stays where it is.
How to restore a deleted file
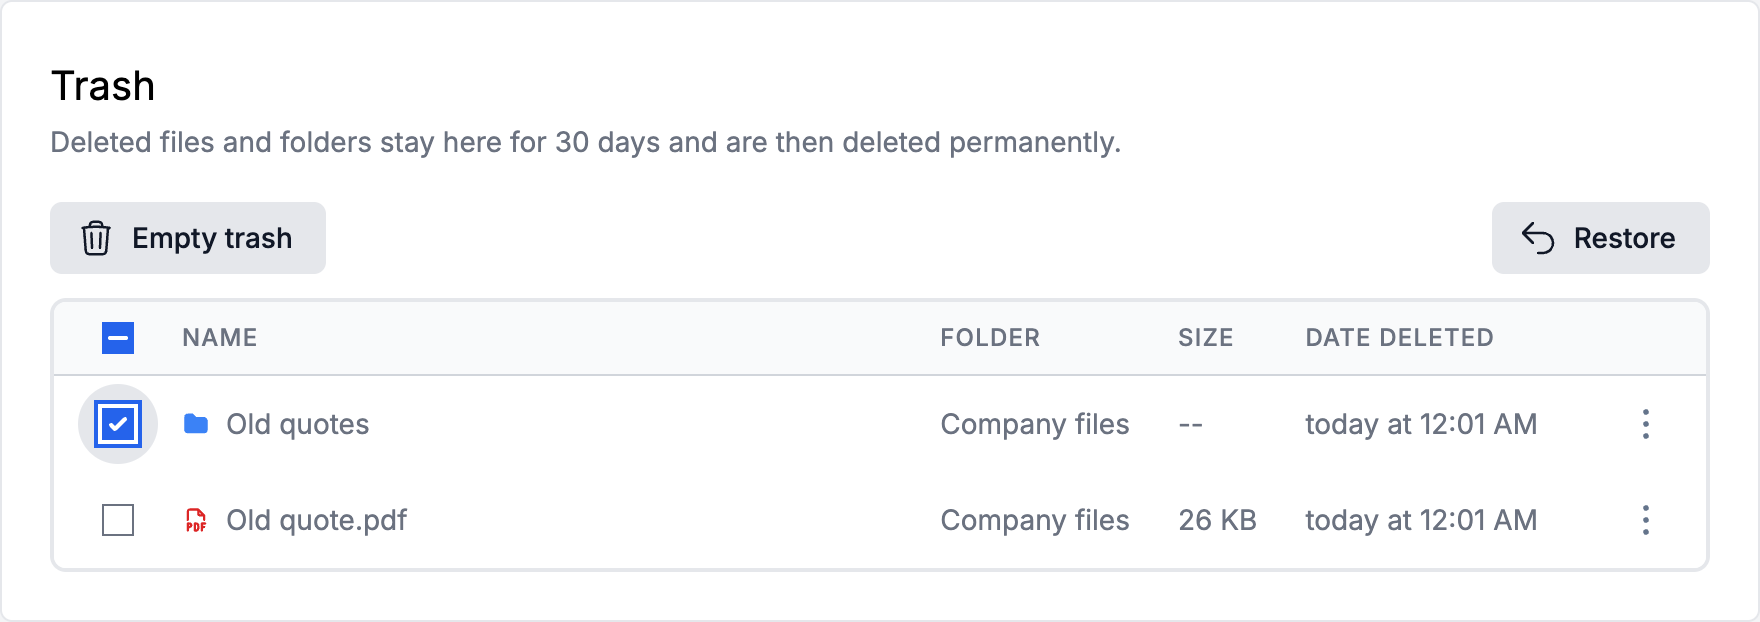
Deleted files and folders go to the Trash and stay there for 30 days. After that they are deleted permanently.
- Open Trash from the menu on the left of the Files page.
- Tick the files or folders you want to bring back.
- Click Restore.
Restored files and folders go back to where they were deleted from, and contact folders go back to Company files. Use Empty trash to delete everything in the trash permanently.
Did not find an answer? Write to us through Feedback in the app or through the contact form.
Ready to get started?
Registration is free, and your first invoice takes only a minute to issue.
Start for freeNo credit card required. You can cancel at any time.